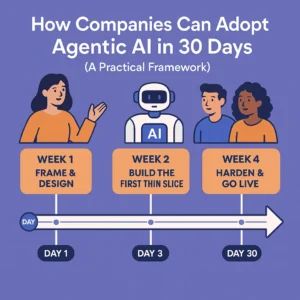
Krivi AI aims to solve a simple but painful reality:
Most people have ideas for AI agents, but
almost nobody wants to write Python, fight with APIs, or deploy servers.
“What if I could just describe the agent I want, connect a few tools, and have it work?”
That’s exactly the promise of Krivi AI — a way to build and run useful AI agents without writing code, using a visual editor, natural language, and ready-made integrations.
In this guide, we’ll walk through:
- What Krivi AI actually is (in plain language)
- The core concepts: agents, workflows, tools, memory, triggers
- How Krivi AI works behind the scenes (simple mental model)
- A step-by-step example: build a lead-qualification agent without coding
- Real-world use cases you can ship today
- Best practices so non-coders don’t accidentally create chaos
1. What Is Krivi AI?
At a high level:
Krivi AI is a no-code platform for designing, launching, and managing AI agents using a visual canvas and natural language — no programming required.
Instead of:
- Spinning up servers
- Wiring APIs manually
- Writing complex code to call LLMs
You:
- Describe what you want the agent to do in plain English
- Drag & drop blocks (triggers, tools, logic) on a canvas
- Connect your existing apps (Gmail, Sheets, CRM, Slack, etc.)
- Hit “Run” and watch the agent work
Think of Krivi AI as:
- Not just a chatbot builder
- Not just “another automation tool”
- But a digital agent studio where non-developers can build workers that:
- Read data
- Make decisions
- Take action across tools
- Run on schedules or events
- Improve over time with tweaks and feedback
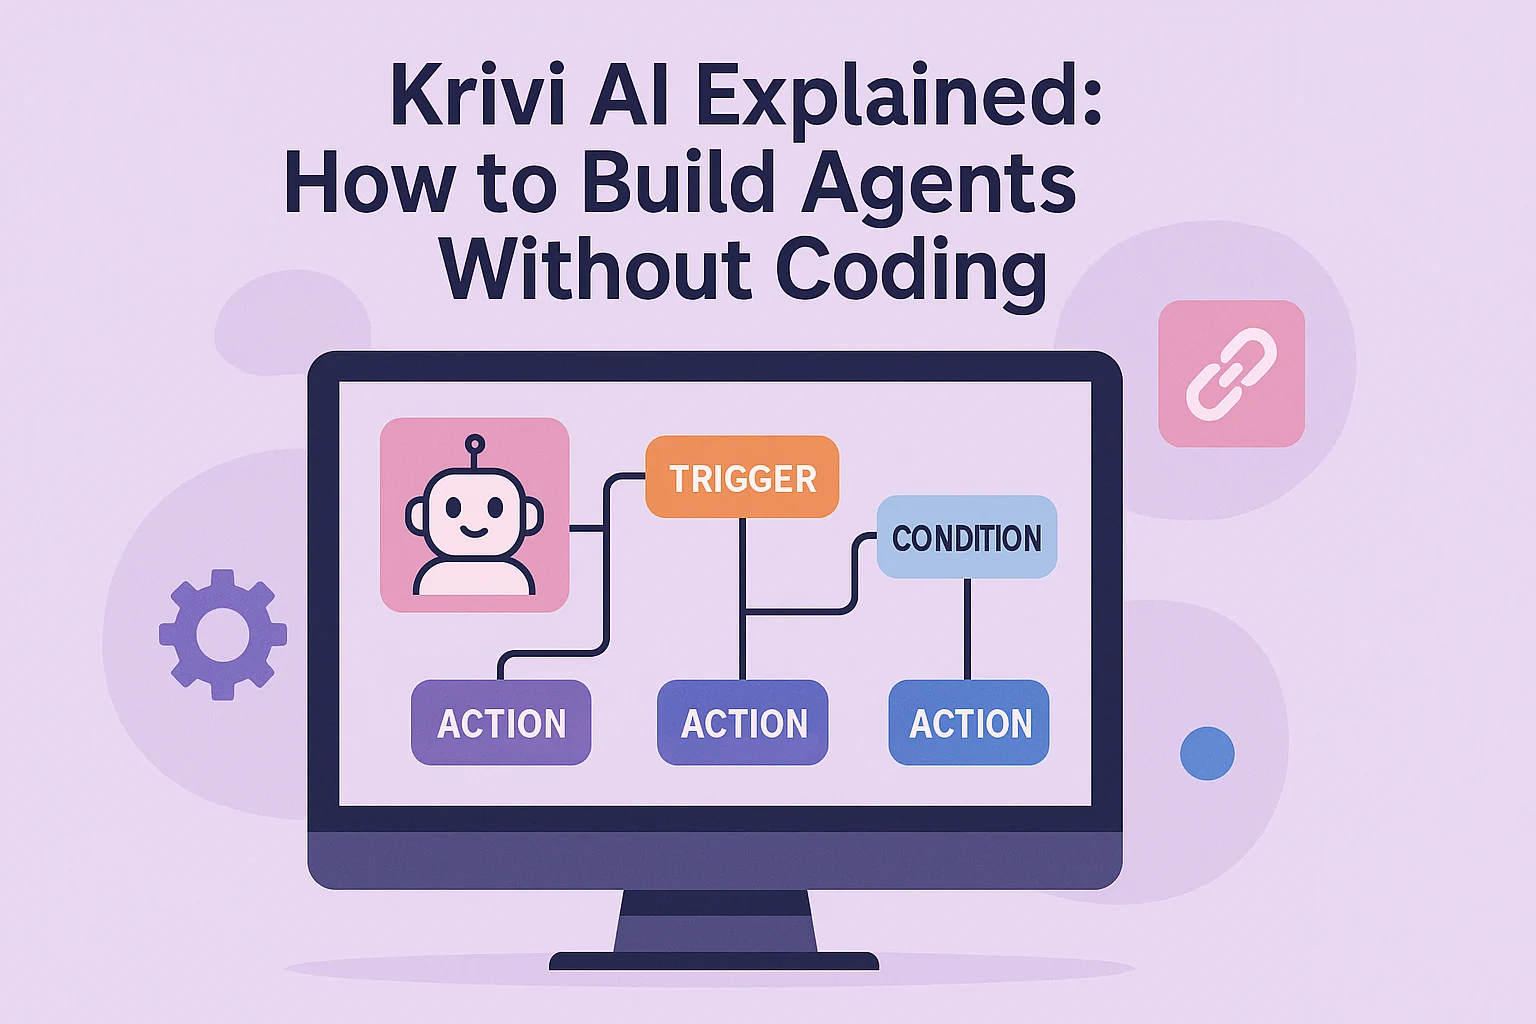
2. Core Concepts in Krivi AI (Beginner-Friendly)
You don’t need to know everything to start.
If you understand these five ideas, Krivi AI will feel much simpler.
Agents
An agent is your digital teammate.
You define:
- Its role: “You are a Lead Qualification Agent…”
- Its goals: “Score leads and decide who should be contacted today.”
- Its tools: “You can read from this sheet, send Slack messages, draft emails…”
The agent uses AI + those tools to move toward the goal.
Workflows
A workflow is the path your agent follows.
Example:
- Trigger when a new row is added to a Google Sheet
- Read the lead’s data
- Ask the AI: “Is this a good-fit lead? Why?”
- If score is high → send a personalized email + notify sales in Slack
- If score is low → tag as “Nurture” and maybe add to a newsletter list
- In Krivi AI, you see this as connected blocks on a visual canvas.
Tools
Tools are how your agent touches the real world.
Some examples you might connect:
- Gmail / Outlook → send emails
- Google Sheets / Airtable / Notion → read & write records
- CRMs (HubSpot, Pipedrive, etc.) → update deals, contacts, stages
- Slack / Teams → send notifications
- HTTP / Webhooks → talk to any API
You don’t write code to use these — you configure them via forms and dropdowns.
Memory
Memory lets your agent remember context over time:
- What conversations happened before
- What actions it already took
- User preferences (tone, language, priorities)
- Past decisions and results
Without memory, your agent acts like a goldfish.
With memory, it behaves more like a long-term assistant.
Triggers
Triggers define when your agent should wake up.
Common triggers in Krivi AI might include:
- “New row added to Sheet”
- “New email in this inbox”
- “Webhook call from a form or app”
- “Every day at 9 AM”
Once triggered, Krivi AI starts the workflow, passes data into the agent, and the magic begins.
Want to know about Ai Agents visit BotCampusAi-Workshop
3. How Krivi AI Works Under the Hood (Simple Mental Model)
You don’t need to see the source code — but a simple mental picture helps.
When your agent runs, Krivi AI basically does this:
- Perceive – Collects inputs: trigger data, records, emails, etc.
- Think – Sends a well-structured prompt + context to an LLM (AI model).
- Act – Uses the AI’s decision to call tools (send email, update CRM, etc.).
- Update State – Saves what happened into memory / logs.
- Loop or Finish – Either runs another step or ends the workflow.
You define what it should accomplish and which tools it’s allowed to use.
Krivi AI handles the boring parts: model calls, data passing, retries, error capture.
4. Example: Build a Lead Qualification Agent (No Code)
Let’s build a realistic agent you could actually use in your business:
“When a new lead is added to my sheet, qualify them and take the next step automatically.”
Step 1 – Clarify the Agent’s Job
Plain English description:
- Reads new leads from Google Sheets
- Scores them 1–5 based on fit
- If score ≥ 4 → send warm, personalized email + Slack alert
- If score 2–3 → tag as “Nurture”
- If score 1 → ignore or log only
This description becomes the basis of your agent’s role prompt.
Step 2 – Create a New Agent in Krivi AI
Inside Krivi AI:
- Click “New Agent”
- Name it:
Lead Qualifier – Google Sheet - Under Role / Instructions, paste something like:
“You are a Lead Qualification Agent.
For each new lead, read their data and score them from 1–5 based on how closely they match our ideal customer profile.
5 = perfect fit, 1 = bad fit.
Then choose what to do next:
- 4–5: move to ‘Hot Lead’ branch
- 2–3: move to ‘Nurture’ branch
- 1: move to ‘Ignore’ branch.”
Krivi AI will use this as the agent’s “brain wiring”.
Step 3 – Add a Trigger: New Row in Google Sheets
On the visual canvas:
- Add a Google Sheets Trigger block
- Connect your Google account (no code, just login/permissions)
- Select your Leads sheet (with columns like
Name,Email,Company,Budget, etc.)
Whenever someone fills a form or you add a row manually, this trigger fires.
Step 4 – Send Data into the Agent
Next block: Krivi AI Agent (the Lead Qualifier you just created).
- Connect the Sheets trigger output → Agent input
- Map fields:
lead_name← Namelead_email← Emailcompany← Companynotes← any notes field
The agent now receives structured data and can decide what to do.
You configure the agent to output something like:
No coding — just selecting fields and defining output structure via UI.
Step 5 – Branch the Flow Based on Agent Output
Add a Conditional / IF block:
- Condition:
recommended_path == "hot_lead"→ go down HOT LEAD branch recommended_path == "nurture"→ go down NURTURE branch- Else → IGNORE branch
Now your workflow visually splits into three paths.
Step 6 – HOT LEAD Branch: Send Email + Slack
In the Hot Lead path:
-
Add an Email node (e.g., Gmail):
-
To:
lead_email -
Subject:
-
Body:
(You can even let the agent generate
short pain summary.) -
-
Add a Slack node:
-
- Channel:
#sales - Message:
🔥 New hot lead scored {{score}}/5: Name: {{lead_name}} Company: {{company}} Reason: {{reason}} - Now sales hears about strong leads instantly.
- Channel:
Step 7 – NURTURE Branch: Tag and Save
- In the Nurture path:
- Add a Sheets Update node: write
"Nurture"into aStatuscolumn - Optionally, add them to a newsletter list or send a soft intro email.
Step 8 – IGNORE Branch: Just Log
- In the Ignore path:
- Maybe just set
Status = "Low Fit" - Or keep them for analytics only.
Step 9 – Test, Iterate, and Activate
- Run the workflow with a few test leads
- Inspect the agent’s scores and reasoning
- Adjust the role prompt or criteria text if it’s being too strict/too generous
- Once happy, switch the agent to active
- You’ve just built a working AI lead qualification agent — without a single line of code.
5. Other Agents You Can Build in Krivi AI (Today)
- Once you’ve built one, ideas start popping up everywhere. Some examples:
- Inbox Triage Agent
- Trigger: new email
- Classify: urgent / important / newsletters / spam
- Action: label, archive, draft replies for certain patterns
- Customer Support Agent
- Trigger: new support ticket
- Read FAQs + past tickets
- Propose a reply, auto-handle simple issues, escalate complex ones with a clean summary
- Invoice & Expense Agent
- Trigger: new invoice PDF in a Drive folder
- Extract vendor, amount, category
- Write to a sheet or accounting tool
- Send weekly spend summary
- Content Repurposing Agent
- Trigger: new blog or YouTube link
- Generate LinkedIn posts, X threads, email snippets
- Save into a content calendar or schedule directly
- Personal Productivity Agent
- Trigger: every evening
- Scan calendar + tasks + emails
- Generate a next-day plan and email it to you
All follow the same pattern:
Trigger → Agent thinks → Agent chooses path → Tools act → State updates.
You’re just snapping blocks together on the Krivi AI canvas.
6. Best Practices for Non-Coders Using Krivi AI
A few guidelines so your agents are powerful and safe:
-
Start narrow
Don’t automate your entire business on day one. Start with one small, annoying task. -
Keep a human in the loop at first
Let agents draft emails, updates, or actions — but review them before auto-sending. -
Name everything clearly
Nodes, branches, and agents with names likeClassify IntentorSend Hot Lead Emailare easier to maintain later. -
Log and observe
Periodically check what your agents are doing. Tweak prompts and rules based on real behavior. -
Add guardrails
Limit which tools an agent can use and what it’s allowed to change. For example, “never send refund emails automatically — only drafts.” -
Version your agents
When you improve an agent, treat it like a new version. If something breaks, you can roll back.
7. Conclusion: Krivi AI as Your No-Code Agent Studio
The old way of building automation:
- Hire developers
- Wait weeks or months
- Pray everything stays in sync when tools change
- The new way with platforms like Krivi AI:
- Drag, drop, and describe what you want
- Let AI handle the “how”
- Iterate in days, not months
- Give non-technical teammates real power over workflows
- You don’t need to become a full-stack engineer.
You just need to understand:
- What the agent should do
- Which tools it’s allowed to touch
- How to design clear, safe workflows
- From there, Krivi AI can handle the heavy lifting.
- For more breakdowns of agents, no-code workflows, n8n + LangChain + LangGraph stacks, and practical automations you can plug into your own projects, keep an eye on BotCampusAI — we’ll keep turning complex AI concepts into clear, buildable systems you can actually use.